Showing posts with label Loom knitting how to. Show all posts

Saturday, November 24, 2007

Fun with coat hangers - or DIY sock blockers!

As I was starting to think of what I want for Christmas (yes...my family requires everyone to make a list every year!), I searched the web for links to sock blockers. Although I always block my other finished knits, I have never blocked my socks because I never had a pair of sock blockers.

These run (I've discovered after searching the web) about $30ish. 30 dollars for 2 pieces of flat plastic or wood? That seemed a bit steep to me...

So in among the Google results came a few DIY sock blocker links. The first seemed like too much work to me. It required materials I didn't have and was too lazy to go and find. Plus cutting and gluing...ick..too much.

So the second link I clicked brought me to this page. I looked at the instructions. Then I turned and looked at my closet...which is right next to my computer. hmmm...I have empty hangers and some Christmas gift socks already made (and in need of blocking). Not 1 minute later I had my first sock blocker made! The hardest part was finding an exact matching hanger!

My favorite part? They come with built in hanging tops. Wet them down and hang them to dry! Out of the way from curious kitties...

Sunday, November 04, 2007

Loom Knitting How To : Knit Stitch Bind-off


See that nice neat bind-off edge on the top of the strap of the Classic Mary Jane slippers? While doing these slippers I didn't want an uneven crochet bind off that is usually done on a loom, so I stole a bind-off method from needle knitting. It has been in the Mary Jane's pattern all along, but just recently I had a request from a customer to be more explicit with my instructions.

So, now on the instructions page of LoomKnittingDesigns.com I have a new free PDF of these more explicit instructions. If you've already bought the Mary Jane's pattern, these instructions may help you along.

Saturday, September 22, 2007

Loom Knitting How To : U-Turns

I got a question in my loom knitting inbox this morning asking "what is a flat panel". The person was interested in my Lacey Shrug (on the left) but was unsure of the flat panel technique this pattern uses.

My explanation was ok (I think) until I tried to explain the turning around part of the process. In the instructions here I want to show the u-turn in all its glory. This is a simple technique and the key to creating a flat panel on a knitting loom.

Before we begin, a little setup here...these instructions are for beginners and will show how to do a u-turn while working an e-wrap panel. You can view any of the images larger by clicking on them. It is also assumed that you are working from left to right and then back in the opposite direction from right to left.


Step #1: Cast on to your loom however many stitches the pattern requires. Just for example sake, let's say you are making a scarf and it's 20 pegs wide. Cast on using the e-wrap stitch across to 20 pegs. This can be on any loom as long as you are using it as a single rake (one single row of pegs). Wrap every peg until you get to peg 20. Then stop!


Step #2: You are on peg 20 and your yarn is hanging out the right side of the peg.


Step #3: To do a u-turn from an e-wrap to another e-wrap stitch in the opposite direction, pull the working yarn back across the top (above the loop) and across the outside of the peg. DO NOT wrap it all the way around peg 20 as you did right before you stopped. Here you are only laying it across the front of the peg. See the picture....


Step #4 Then start e-wrapping back in the opposite direction. You will now be e-wrapping counterclockwise around the pegs and wrapping pegs 19 through peg 1 all the way around as you did in the first wrap.


Step #5: Once you get all the way back to peg one, lift all the stitches up and over the pegs just as you do in a normal in-the-round row. All your pegs should have 2 loops on them including peg #20. Although, peg #20 has a small loop on the bottom and a large loop on the top the connects #19 and #20.


Step #6: Now you are ready to go back across (left to right). This is done in the same way only in the opposite direction. Just as before, pull the working yarn back across the top (above the loop) and across the outside of the peg #1. DO NOT wrap it all the way around. Then e-wrap back across as you did in the cast on row.

I hope these instructions make u-turns easier. Creating a flat panel is pretty easy if you master the u-turn. In the instructions section of LoomKnittingDesigns.com there are instructions on how to bind off a flat panel. Once you get to the end of your scarf project (or whatever flat panel project you choose), these will help get it off the loom.

Thursday, July 26, 2007

A good article on blocking

ru knitting daily? In my knitting inbox yesterday was an article that I thought I should post. It was a two parter (the second part is coming soon) on the basics of blocking your finished knits. I thought this would be helpful for knitters and loom knitters alike. And, if you don't already receive the Knitting Daily Newsletters, you're potentially missing out on a lot of good info and free patterns. Click on the "Are you knitting daily?" image above to sign up...

If you are new to the blocking concept, check out this Knitting Daily post on blocking or the PDF on my method of blocking over on the Instructions page of LoomKnittingDesigns.com. I think they both will help you sort it all out. It really does make a difference in your knits.

UPDATE: Check out the now posted second part of the blocking tutorial. Great stuff - http://www.knittingdaily.com

Saturday, April 28, 2007

Part 2: tips for following a loom (or needle) knit pattern

In part 1, I discussed the tools that I use to keep track of my progress in a pattern while I'm knitting. Today's post also contains tools, but more tools for the brain. I've learned that some patterns, while written correctly, require a little tweaking in order for me to remember the pattern more easily. A better memory of the pattern requires less reading and knitting at the same time and a faster project in all.
So, the first trick I use is breaking down the pattern into steps. This only really works if the pattern is a simple repeat and isn't many, many rows long. I guess you could write out a longer pattern, but it becomes more tedious then helpful - I would think.

While working this project (on the left) I was working in a Michaels store as a demo for an upcoming knitting class. While the pattern is easy enough, it becomes difficult when you have to start and stop and answer questions for customers walking by.

The solution: I made index cards out of each pattern row. Since there were only four rows it wasn't a big deal. I numbered each card (really just a scrap of paper) with it's row number in case a curious child decided to shuffle them or a breeze knocked them off the table. Also on the card was each pattern row written out.

While knitting I would knit the first index card. After I finished that row, I would flip the stack to the next card. After finishing that row, I'd flip the deck to the next...and so on. So now customers could ask a bunch of questions and I wouldn't get lost. Some even asked about the card flipping!

Another trick I use is "rewriting" or "rechunking" (as I like to think of it) the pattern repeats in order to make it more easy to remember. In the same shawl pattern pictured above I rewrote the 2nd pattern row. It was correct in the pattern but hard for me to remember without reading and re-reading while I knit across.

As written, it goes *k1, yo, k2tog (repeat from *) or knit 1, yarn over, knit 2 together, repeat across the row. Since this same pattern has in the 4rth row basically the same thing without the k1 in between, I kept forgetting to k1 on this row. My shawl kept getting screwed up and I was getting frustrated.

So, I "rechunked" the pattern row to be: k1 *yo, k2tog, k1 (repeat from *).

Now, granted this may not work for everyone. When I knit I find there is always a natural pause in a pattern. In this pause I can look around, answer a question, take a drink...etc - without getting lost or have to recount stitches to find my place. I know where I stopped because it makes sense in my head. If the natural pause comes at the end of the pattern repeat as it's written...great! I can follow it no problem. Here, the natural pause in the pattern was after the k1 - which I kept forgetting. I moved the k1 to the end of the repeat and it stuck. I could knit the repeat and not get screwed up. As long as the "rechunked" repeat comes out the same as the old one, it'll work fine.

That's it for part 2. I hope some of this is of use and helpful 'cause there is one last post to go :)

With that, I'll leave you with a gratuitous picture of the cat. He doesn't make my blog enough and is oh so cute. Say hello Yakko!


Thursday, April 19, 2007

Part 1: tips for following a loom (or needle) knit pattern

So I've read many comments on the yahoo loom knitting group message boards and in my own loomknittingdesigns inbox from people that are either:
  1. intimidated to try a more advanced pattern
  2. frustrated at following the more advanced pattern, or
  3. following the pattern is ok but its hard to pick up and put down and still know where the heck you are
So, with this in mind, I thought I'd serve up a little slice of what I've learned about following patterns. I'll be doing this over a three part series of posts. The topic for this first post is "The Tools". So, without further 'splainin...

1. The Tools
Following patterns used to be intimidating when I was a new knitter. Long strings of knitting abbreviations made my brain shutdown and my palms sweat. Until you get a handle on the abbreviations themselves, they look like Greek. And before you get the hang of following pattern repeats it's a lot of looking back and forth between pegs or needles and the printed pattern and trying to read and knit at the same time. Not fun!

Well, an easy trick to help here is writing. The only things you'll need for this tip are a print out or photocopy of the original pattern and a pencil. This is a useful tip from many perspectives. For one, your original pattern doesn't get beat up from being carried around in your knitting bag and two, you can write on the copy and mark it up without worrying about messing up the pattern for later use.

While knitting one of my latest knits "The Bed of Roses" shawl, I had a print out and a pencil. As I knitted I made notes, crossed off rows as I completed them, and made hash marks as I went to count off repeats. This helped me keep track of where I was in the pattern and gave me a visual que as to how far I had to go.
This can also be done using a row counter (pictured on the right), but I find marking on the pattern itself a bit easier when following a complicated stitch pattern. I mostly use row counters to do simple counting of rows or to record what number row I just completed. The latter method helps when you have to start and stop a pattern in the middle of a repeat, for example.

Another useful tool is the row marker (pictured on the left). Row markers are used for many things. I've used them to mark shifts in pattern rows, beginnings or endings in pattern repeats/increases/decreases, and marking length measurements as I knit. Sometimes a pattern will tell you to place a row marker and sometimes they don't. Row markers may take a bit of practice to know when they will be a useful addition and when they'll just get in your way.

That's it for Part 1! Two more to come so stay tuned. If anyone has a specific question on anything here or a tool that I didn't cover, leave me a comment and I'll address it in a future posting.

Monday, March 05, 2007

Spool knitting hits Craftzine

I was surfing the web this morning before work and came across a Craftzine post for spool knitting. Not having tried that particular segment of the loom knitting world...the link to this article actually made me want to try it. There is a later post about the same topic here.

I love all these blogs devoted solely to crafts. I learn a lot just by surfing around. I subscribed to the CraftyPod blog, too....so I wont miss a thing!

Friday, January 12, 2007

Drop Stitch Instructions for loom knitters

I received an email from a good customer of mine requesting some further instruction on working the drop stitch on a knitting loom. She had purchased the Power Scarf pattern and needed a little more guidance then just the written instructions that come with the pattern.

Well, honestly, I had been meaning to do this for the longest time...so a customer request was just the kick in the rear I needed. Some coffee, a few digi pics and some writing later, and wah lah!

See these free instructions in the Instructions section over at LoomKnittingDesigns.com. If you purchased the Power Scarf pattern and are scratching your head - this new free PDF might help!

Enjoy!

Tuesday, October 31, 2006

Happy Halloween!


Happy Halloween everyone! Hope you haven't eaten as much candy as I have...

While waiting around on the Trick or Treaters, I put together another free PDF of instructions on LoomKnittingDesigns.com. This one is on blocking. When to do it, why you would do it, and most importantly how. I have a quick and painless way of blocking and I've made it available for you! If you own the Waves of Lace Shawl pattern, go download these. It's an essential part of the lacy lace process :)

The new PDF is in the instructions section:
http://www.loomknittingdesigns.com/instructions.html

Friday, October 27, 2006

Flat Panel Bind Off - a how to for loom knitters

So tonight, before working on another pair of needle knit socks I thought I'd type up another set of free instructions. Then I thought, heck...why not put a little post on my blog, too. Since I've heard a lot of questions about this on the yahoo loom knitting boards, I wanted to help clarify. Hopefully everyone will find these helpful.

Go to LoomKnittingDesigns.com in the "Instructions" section and download the PDF or see below for some step by step instructions on binding off a flat panel of knitting from a single rake (like the knifty knitters!):

Materials Needed:
  • Any knitting loom used as a single rake. Here I use a red Knifty Knitter loom.
  • Lion Brand Thick N’ Quick – or similar Super Bulky Weight yarn for practice
  • Knifty Knitter yarn pick
  • Large Crochet Hook (about the diameter of a pencil)
  • Scissors
Set up:
For the purpose of these instructions, I cast on to 5 pegs across using the Knifty Knitter red loom and knit a total of 5 rows before beginning the bind off instructions below. If you are practicing, I’d recommend having at least 5 rows of knitting on your loom before binding off. Any less then this and your knitting might be a little tough to maneuver.

Step 1:
You have your panel of knitting and you are ready to stop knitting. Since I’m right handed, I like to end on the right side away from the thumb tack if possible. If you are a lefty, it might be easier to end on the left side next to the thumbtack.


Step 2:
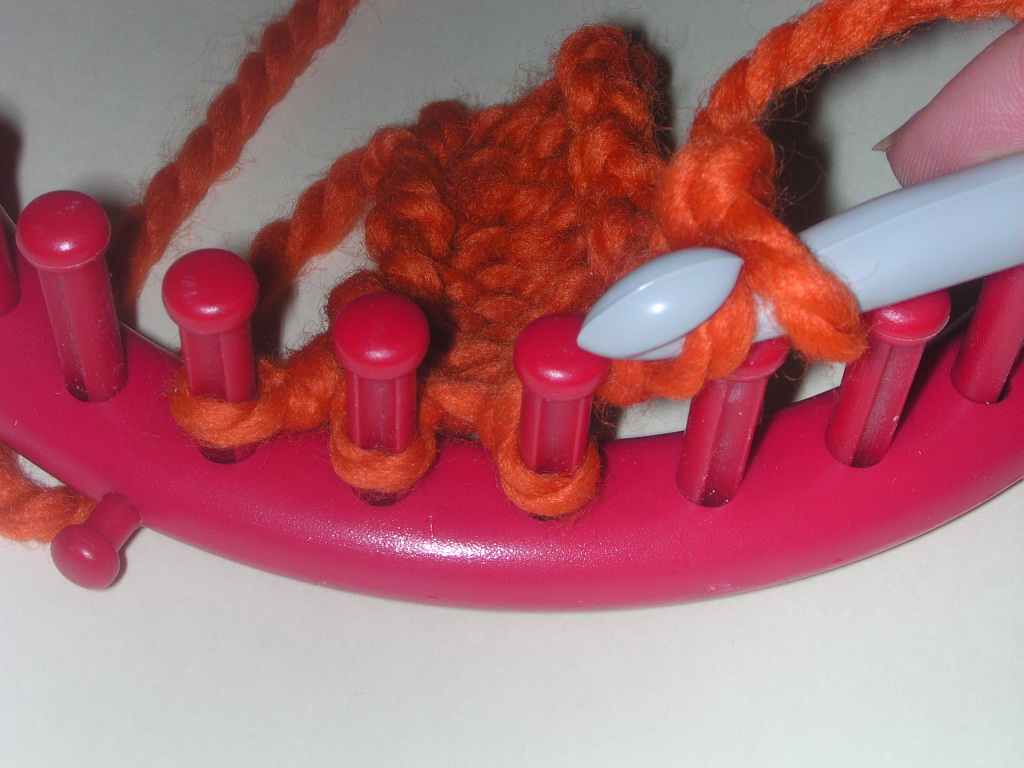
Pick up the first loop from the first peg and place it on your crochet hook.

TIP: It may be easier to grab the loop with your fingers.


Step 3:
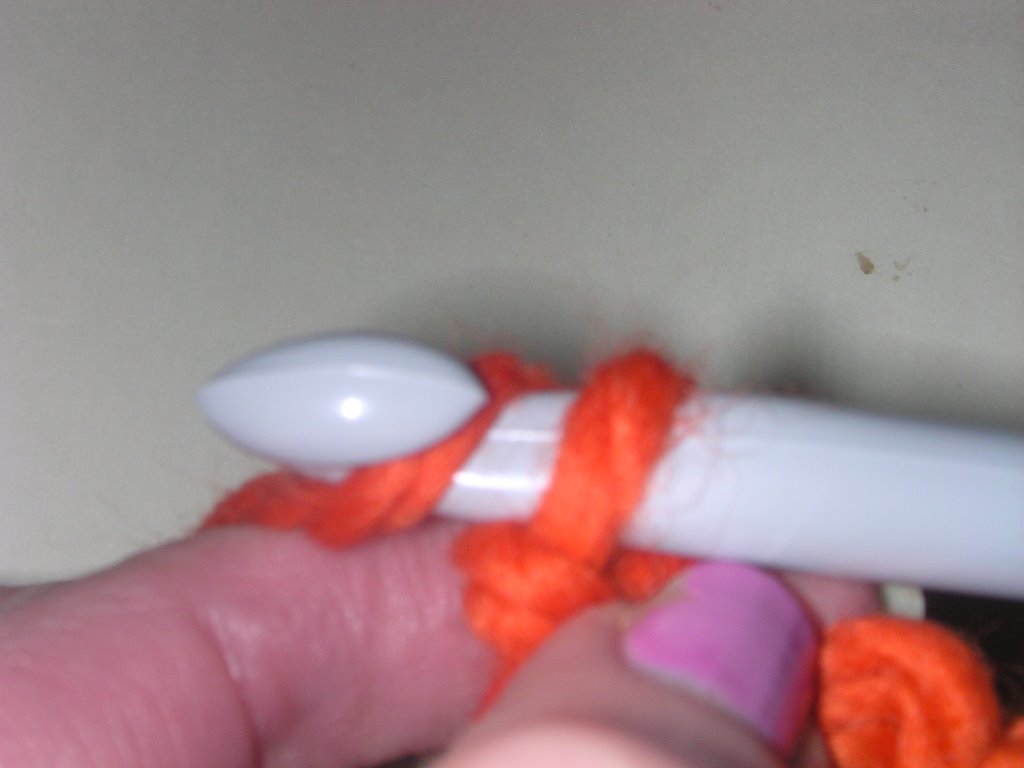
Without cutting the working yarn, lay the working yarn across the end of your crochet hook between the loop you placed on in step 2 and the hook end.


Step 4:
Now pull a loop of working yarn through the loop from the loom. The loop from step 2 should now be off your crochet hook and you should be left with one loop of working yarn.


Step 5:
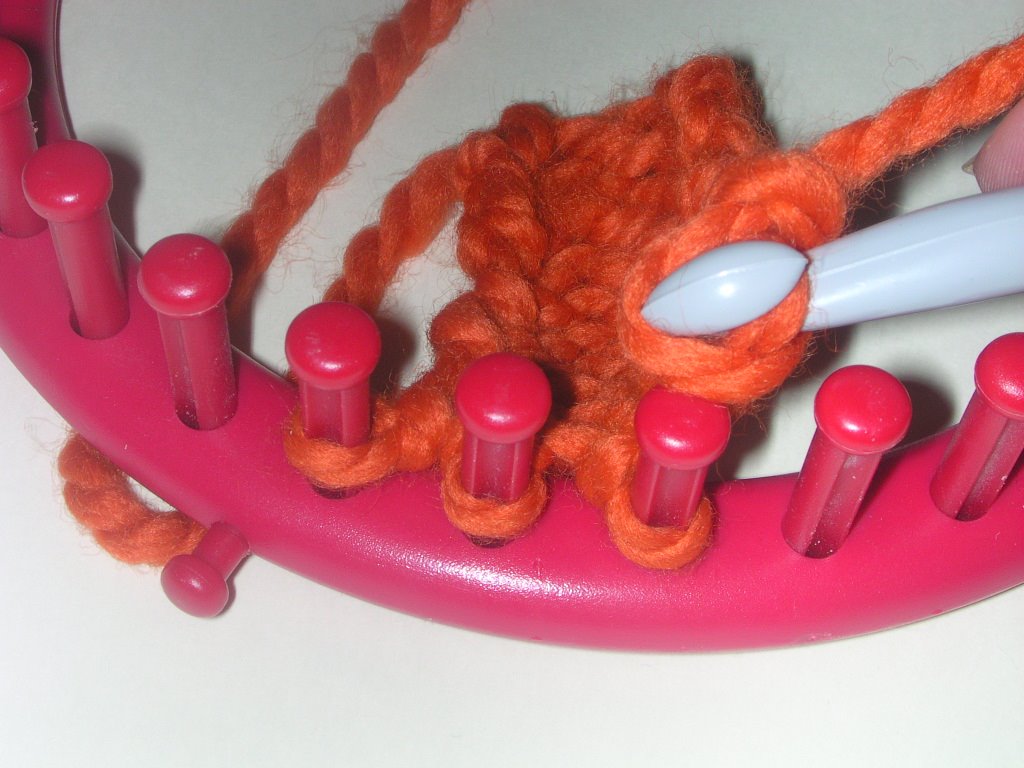
Now pick up another loop from the loom from the adjacent peg. If you are a righty, it’ll be the next peg to the left. If you are a lefty, it’ll be the next peg to the right.

Place this loop on your crochet hook just as you did in step 2

Step 6:
Then pull the loop you just placed on your hook from the loom through the loop you made in step 4.

You should now be left with one loop of yarn on your hook.


Repeat:
Now repeat steps 3-6 above until you get all the loops off your loom.


Final steps:
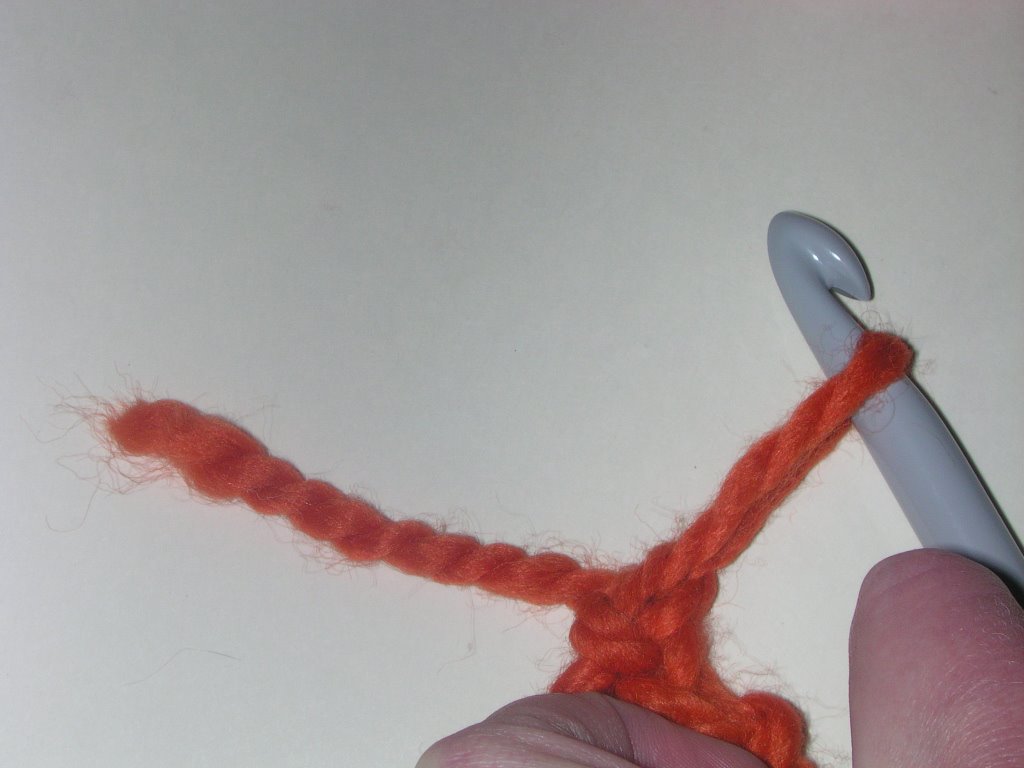
To end the last loop, cut the working yarn leaving a 6 inch tail. Then wrap the end of your crochet hook with a loop of working yarn. Just as you did in step 4, pull a loop of working through the last loop.


Now pull the 6 inch tail all the way through that last loop. Give that tail a little tug after it’s through to tighten that last stitch.

Weave in this tail using a yarn needle.