Wednesday, September 26, 2007

As seen on...


..Craft! I don't think I've ever seen a cozy pattern that I actually ever wanted to make...but THIS I really want to try. I'm sure it's even easily made on the looms.

They are knit cell phone cozies! I love the green one.

I don't know...maybe too hard for me to resist.

Sunday, September 23, 2007

More Vintage knitting


The last time I went home to visit my family in Maine, my mom gave me another vintage knitting magazine she'd found in her travels. It's a McCall's Needlework & Crafts issue from Fall-winter 1956-57. It not only has knitting patterns but crochet, sewing, weaving, and woodworking. It sounds like the Craft magazine of the 50's.

One thing I find particularly interesting is an ad for something called the Ezee-Knitter. It looks almost like a round knitting loom with pegs, but I don't think it is really.

I did a quick search on the interwebs and came up with some more explanation. On the Girl from Auntie blog (who acquired one in real life from Ebay), I found this explanation:

"Like most knitting frames that predated it, the Ezee Knitter has two equal sets of pegs set equidistantly long the edge of a gap such that the pegs are aligned in staggered fashion. Unlike previous knitting frames, the gap was curved along an arc, so the pegs along the inner edge of the gap are naturally placed closer together than along the outer edge.

In use, the knitter would wind the yarn around the pegs of the device, wrapping twice around the end peg, then wind the yarn back along the same path. Once the winding was complete, the lower strand of yarn was lifted over the upper strand of yarn on each peg using
the crochet hook. The hooked stitches would form the knitted fabric and feed through the gap. A particular stitch pattern–ribbing, stockinette, twisted stitches–could be obtained by wrapping the yarn along different paths. The instructions glibly promised that “Of course, one can apply the argyle or pattern weaving instructions in any knitting instruction book” to the Ezee-Knitter, by simply winding different colours around the pegs at different intervals."


I also found this posting on Ebay for the instruction booklet that goes along with the machine itself. Patterns were included. Looks like it'd be fun to play with for a while. Not sure how great it is in use, however.

There are a few patterns I like from this magazine, too. If I made them, I'd probably do a little updating to the style.


Saturday, September 22, 2007

Loom Knitting How To : U-Turns

I got a question in my loom knitting inbox this morning asking "what is a flat panel". The person was interested in my Lacey Shrug (on the left) but was unsure of the flat panel technique this pattern uses.

My explanation was ok (I think) until I tried to explain the turning around part of the process. In the instructions here I want to show the u-turn in all its glory. This is a simple technique and the key to creating a flat panel on a knitting loom.

Before we begin, a little setup here...these instructions are for beginners and will show how to do a u-turn while working an e-wrap panel. You can view any of the images larger by clicking on them. It is also assumed that you are working from left to right and then back in the opposite direction from right to left.


Step #1: Cast on to your loom however many stitches the pattern requires. Just for example sake, let's say you are making a scarf and it's 20 pegs wide. Cast on using the e-wrap stitch across to 20 pegs. This can be on any loom as long as you are using it as a single rake (one single row of pegs). Wrap every peg until you get to peg 20. Then stop!


Step #2: You are on peg 20 and your yarn is hanging out the right side of the peg.


Step #3: To do a u-turn from an e-wrap to another e-wrap stitch in the opposite direction, pull the working yarn back across the top (above the loop) and across the outside of the peg. DO NOT wrap it all the way around peg 20 as you did right before you stopped. Here you are only laying it across the front of the peg. See the picture....


Step #4 Then start e-wrapping back in the opposite direction. You will now be e-wrapping counterclockwise around the pegs and wrapping pegs 19 through peg 1 all the way around as you did in the first wrap.


Step #5: Once you get all the way back to peg one, lift all the stitches up and over the pegs just as you do in a normal in-the-round row. All your pegs should have 2 loops on them including peg #20. Although, peg #20 has a small loop on the bottom and a large loop on the top the connects #19 and #20.


Step #6: Now you are ready to go back across (left to right). This is done in the same way only in the opposite direction. Just as before, pull the working yarn back across the top (above the loop) and across the outside of the peg #1. DO NOT wrap it all the way around. Then e-wrap back across as you did in the cast on row.

I hope these instructions make u-turns easier. Creating a flat panel is pretty easy if you master the u-turn. In the instructions section of LoomKnittingDesigns.com there are instructions on how to bind off a flat panel. Once you get to the end of your scarf project (or whatever flat panel project you choose), these will help get it off the loom.

Thursday, September 20, 2007

The Mystery Stole 3 is Finished!

WooHoo! My Mystery Stole 3 is finally finished and being blocked as I type. I finished knitting it last night, I did some end weaving when I got home from work and immediately soaked it and pinned it out.

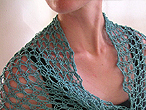
If I were a patient person I'd wait until this weekend when I'm home while the sun is up and I could get some pictures that will do the stole justice. But, alas...I'm just not that patient. So, here is the stole being blocked. Try to see through the rotten pics and see the lusciousness of the finished knit...


Love the wing!


I have some more news...but I'll let the finished stole be it's own magnificent post!

UPDATE - (already?) While I'm sitting here reading my own blog post and admiring my stole...I got an email from the stole designer (well, really it's an email from her blog). And, as it turns out, this luscious pattern is now available on Melanie's site. I'm purchasing it! How 'bout you?

Tuesday, September 18, 2007

A whole month?

..and then some. What the heck have I been doing...?


Well, besides being super busy at work...I've been knitting like a fiend on the Mystery Stole 3. Yes, others have been done forever...but I'm slowly plugging away at the last clue. Not because it's hard or anything. I got to the last clue and then work and life got in the way. But, now I'm about 20ish rows from the end. Yippee! I can't wait to be done.

As you can see from the above close up of the wing, it's going to need a good solid blocking. But I love the wing part. I've seen a bunch of finished stoles on the web and in the group and I can't believe how gorgeous they look on. The asymmetric design really looks great. Striking and different - that's what I wanted! I will be buying the pattern once I'm finished just to give some monetary support to a talented designer.

I've also recently purchased a whole slew of knitting mags. I was in a no magazine slump for a while...I hadn't been to a book store in months and was in need of some knitting inspiration. I'd heard so much about the Tilted Duster sweater in the new fall Interweave Knits so I went in search of a copy. The new Vogue Collectors addition and the new Knit Simple mags just somehow found their way into my cart... I'm so inspired now! Here's a little sampling of what I want to make from each:


The Tilted Duster from IK, of course. The front and...

...the back


This simple one from Knit simple is enticing.
I love the yarn, the color, and the simple design.


And this one is from Vogue. Somewhere between sweater and shawl. I love it!

There is also some greatness in the new fall issue of Knitty. But I'll leave my favorites for another post. See yah!